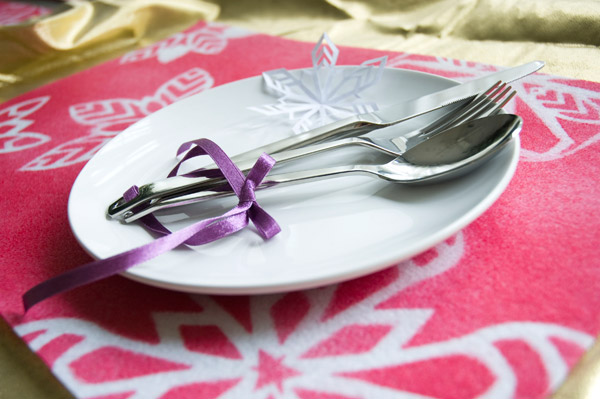
Paper-snowflake placemats

I my Christmas decorations to look different from year to year. Since I can’t afford (or bear) to throw out all my holiday stuff and start over at the drop of a hat the way rich and/or cruel people must, like Dick Cheney or Oprah, I try to change out small things that have a lot of impact and a negligible price tag, which brings us to my DIY paper-snowflake placemats.
This might be the simplest tutorial I’ve come up with yet. Don’t laugh at me. Next week, I will bring you tutorials on opening and closing doors, getting water from the tap, and sneezing.

You only need three things to make paper-snowflake placemats:
- A few placemat-sized pieces of felt.
- Some fabric spray paint, which, unlike regular spray paint, doesn’t stink, can go in the washing machine, and can be purchased, even by minors, without ID. Fabric-based graffiti must be at a minimum. Let’s bring it back! Tag your neighbors in the pants!
- A bunch of paper snowflakes. Make these yourself, or have a child make them, if you have access to one.
Once you’ve got your snowflakes made, this project is practically finished.
But don’t worry if you suck at snowflakes. For most of my life, my paper snowflakes have looked absolutely nothing like snowflakes. I followed the rules as I understood them—fold the paper, cut holes along the edges, unfold—but they always turned out like this, more closely resembling overworked face-ham than snow from the sky. I bring it up because curiously, I still thought my paper snowflakes were super awesome, and I made them all the time, never once stopping to wonder why they were called ‘paper snowflakes’ if they were just meant to be ambiguous ham-shapes.
At some point, usually early toddlerhood, we all begin to question the world around us. For me, snowflake-wise, it happened in my mid- 20s. I saw a proper paper snowflake, noticed the familiar fold lines, and finally put two and two together. It’s a wonder my entire world view wasn’t disrupted. Luckily, my latent snowflake discovery didn’t lead to any further exploration or learning.
Anyway, now that I understand what I’m doing, my snowflakes are better. Not spectacular, but better. It’s not always easy to fold them properly into twelfths, and sometimes I don’t have the best luck freehanding nice points with the scissors. To simplify the folding, I made myself a little template I could print out with fold lines. That really helped. Then I figured, as long as I was at it, I might as well draw up a couple of foolproof snowflake shapes, too.
So now I’ve got a bunch of little snowflake templates I can print at any size, fold, and cut. When finished, the printed lines are barely visible, and the snowflakes are damn near Martha-Stewart-flawless.
I know it sounds anal retentive, but I swear, it’s such a time-saver, and sometimes it’s nice when all my snowflakes match. At any rate, you don’t need a template! You are a free spirit! Go ahead and freehand your snowflakes! It’s super fun!
And if you should get tired of that…


…then just click these snowflakes to download each printable PDF template. There is no shame.

You probably already figured out how to finish this project while I was going on about snowflakes, so I’ll run through the rest quickly. Be sure to work someplace where you don’t have to worry about overspray, because this stuff stains. That’s its whole job.
First, arrange your snowflakes on one of your felt placemats. Now, you might be tempted to pin them down, as I did above, but beware! Pins make holes. Just remember that. Pins make holes.

Spray the whole thing, coating the felt as evenly as you can. My fabric spray paint instructions came with two valuable hints:
- Always begin and end each spray on the newspaper, not on your work. When you first start spraying, and sometimes just after you stop, some paint splatters out of the can. You don’t want splatters on your placemat, especially if you’re using red. It’ll look like there’s been some kind of grisly slaying. Or sleighing! HA! But seriously, sleigh accidents are no joke. Except sometimes.
- Spray in little continuous circles. This seems to work well for getting reasonably even coverage all over.

Don’t take your snowflakes off the placemat until they begin to dry. The paint will make the paper soggy at first, and if you pick up the snowflakes while they’re soggy and dripping with paint, then they’ll probably tear, and the paint will drip down and stain your white snowflake shapes. It’ll look neater if you just wait a few minutes.
After you remove the snowflakes, set them aside and lay them flat to dry completely. Then you can use them again!

Remember what I said about pins? And holes? The placemat on the left was pinned. The placemat on the right wasn’t. Paint dripped down through the pin-holes in the left snowflake and made little splotches. Sure, you can get crisper edges if you pin the snowflakes down, but is it worth the cost? You have to look inside your heart. That’s a question only you can answer.
Or I can help you. No, it isn’t. No pins.

That’s all there is to it! Craft finished! In minutes!
When they’ve dried completely (an hour should be plenty), set them out on your new, refreshed holiday table. If your placemats should meet their doom at dinner, try tossing them in the wash, and if they fare poorly, who cares? Cut some more snowflakes and make new ones! Because that’s how you roll now! You can just throw them out! Have new ones! Don’t even have to think twice! Oprah, eat your heart out!
Egad, what a horrible expression.
Total cost of this project:
Felt: 4 sheets at $.79 each = $3.16
Fabric Spray Paint: 1 can, purchased on clearance and completely used up = $1.50
Snowflakes: 8 sheets of printer paper at… uh… $.01 each? = about $.08
Total: $4.74
Per placemat: $1.19