Make Your Shelf at Home: Revamping a $10 Bookcase
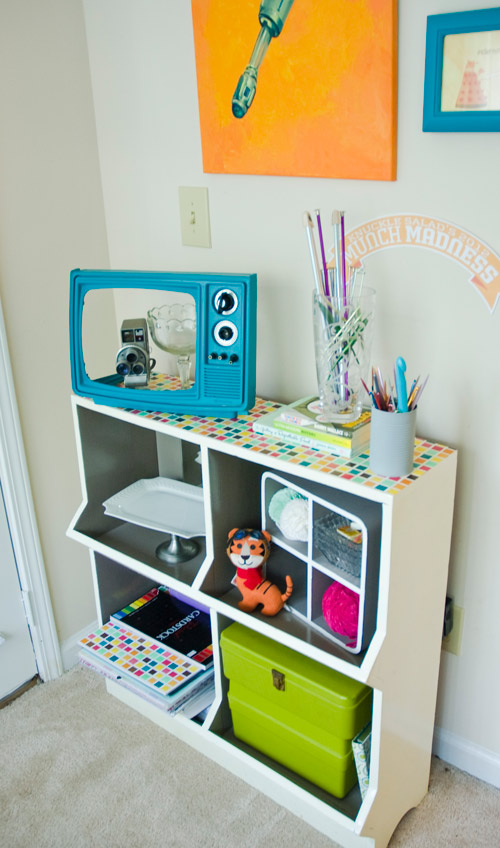
Our sunroom houses my little home office, but it didn’t originally. When we moved in, it was more of a room-we-don’t-know-what-to-do-with-so-we’ll-put-all-the-extra-boxes-there-until-we’re-done-unpacking sort of area, and at the end of all the moving in, four boxes remained, forming a tower that loomed over me as I worked. I hung curtains, got houseplants (now long dead of course), and put art on the walls, but there were the boxes, ignored and despised.
They stayed there for about a year. Living with them sucked, but looking back, we deserved it. We deserved it because most of them were empty. We kept them because we thought they were too nice to get rid of. We thought we’d want to use them again the next time we moved.
We do the dumbest stuff.
One day, I looked directly at the tower of boxes for the first time in ages, and I realized I had the power to remove them. I recycled them like any normal person would’ve done months before, found a space for the few leftover items in a closet previously believed to be full (never underestimate my drive to cram more stuff into a closet) and admired the glorious vacant space in my little office.
Thirty seconds later I began brainstorming ideas to fill the space.
By the end of the day, I’d announced my plan to grab some kind of cheap secondhand unit. Easy! Of course, because of the narrow space, it could only be about a foot deep and four feet wide, but how hard could it be to find something like that?
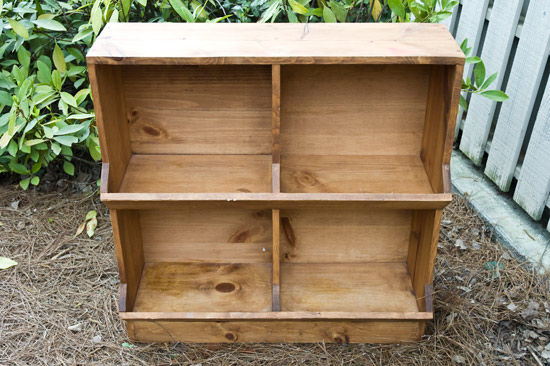
Pretty hard. But I had no trouble finding a hideous, awkward bookcase-thing in exactly the right size.
Personally, I liked how weird it was. It was clearly homemade and it must’ve been meant for toys or something, because the front of each shelf had been turned into a kind of bin. The naked wood was a filthy, dented, crayon-ravaged mess, sure. But it was $10 at a charity thrift store and, more importantly, it was going to fit.
So I took it home and got to work. And by “work” I mean a half-hearted scrub, some wood filler and a few coats of paint, because no matter how much I could improve my life by sanding things before painting, I just…I mean…sanding sucks, you guys.
Sanding sucks so much.
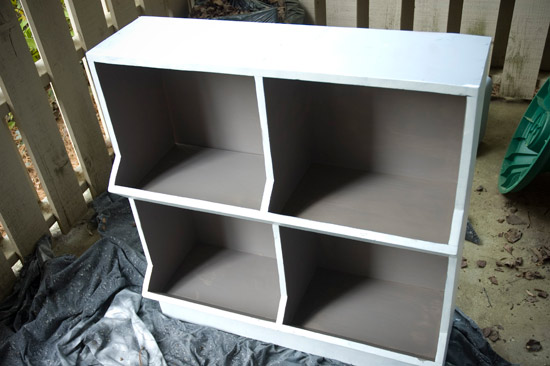
See? You barely notice how unsanded it is, if you squint. Lecture me all you want. I don’t regret skipping it.
If I had it to do over again, though, I would choose a water-based varnish. I thought I was being so smart. Oil-based varnish was $1 cheaper at the hardware store, which I assumed was because other consumers just… didn’t know what “oil” meant or something.
Turns out, maybe I didn’t really know what “oil” meant myself. I definitely didn’t know that in much the same way that little boys are made of snakes and snails, oil-based varnish is made of noxious fumes and dreadful inconvenience. I didn’t know it was viscous and difficult to spread. I didn’t know it would dry with a slight amber tint. And I didn’t know it was going to stay extremely sticky for the better part of a day, attracting every wind-borne bug and dead leaf in a 30-mile radius.
So I wouldn’t make that choice again, but it all worked out okay. The amber tint accidentally gave the finished piece a warmth I really like, and the thickness and durability of the oil-based varnish meant I could use virtually anything for the surface on the top, including this super cool embossed scrapbook paper I had picked up on a whim at a Tuesday Morning some weeks earlier.
Sure, if you get too close to the paint job (i.e. in the same room), you can see assorted pieces of grit permanently embedded in the glossy finish, but that’s part of its handmade charm.
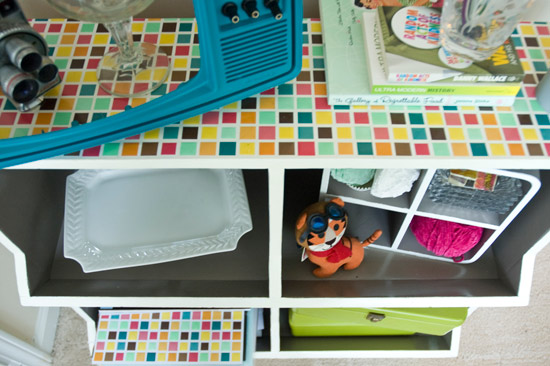
I had intended to use the shelves for storage. But it all looked so cute when it was finished that I couldn’t bear the thought of loading it up with sad, unsightly clutter. Instead, I started making little vignettes of my favorite stuff, which critically threatened the usefulness of the project as a whole.
However, the paper I had chosen for the top gave me options. I soon realized that this piece of furniture could provide open storage and look pretty, which was an alien concept. All I needed to do was select cute, brightly-colored useful items for storage in Prime Office Storage Areas One through Five. Ugly stuff could stay in Jumbled Closet Three.
With that in mind, one cubby became a safe place for my favorite little cookie stand (another thing I made out of thrift store junk and noxious fumes) when not in use. Atop the cookie stand, I can also safely store my camera. You’ll have to take my word for it, because my camera is not in these pictures. I don’t have to tell you why, do I?
Another cubby stores printer and craft paper, which looks surprisingly tidy because it’s topped with a stack of the same paper I used to decoupage the top of the piece. I consider this a masterstroke. I also consider it a very lucky coincidence that that paper happened to be sitting on top of the stack when I put it down. I will never move it.
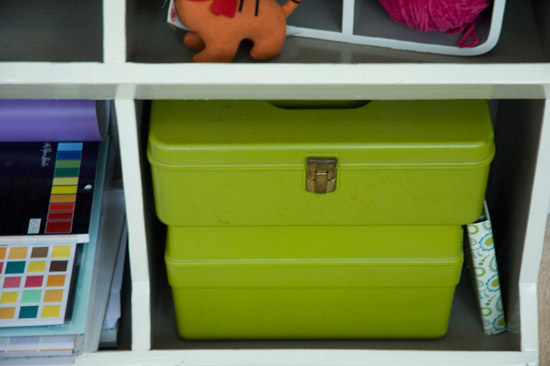
For the first time in a long time, I can get to my sewing boxes without hunting for them. They are very old and green and have excellent hidden sorting capabilities. I got them for virtually no dollars at an estate sale. And they’re one big solid color, which helps the area look less cluttered.
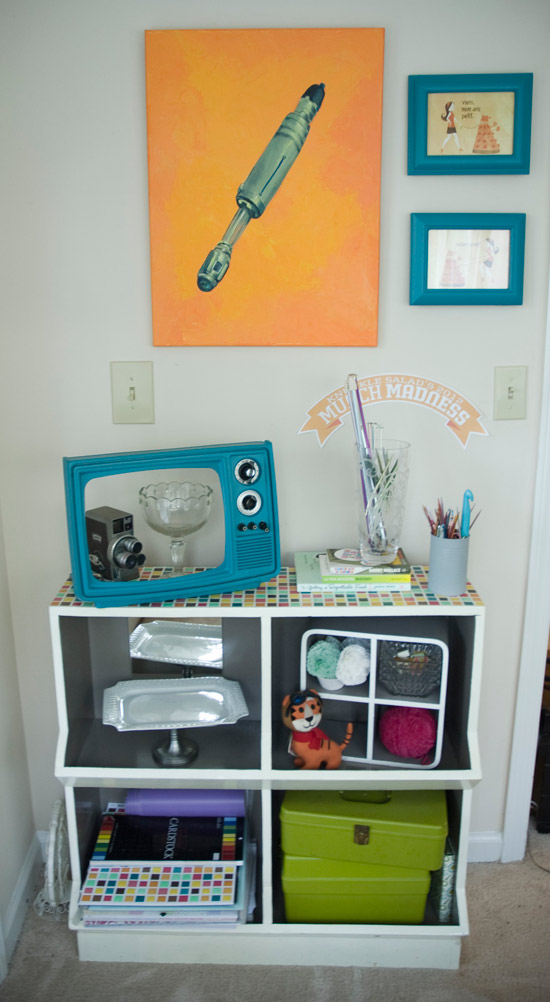
I painted a smaller shelf to match and set it inside the remaining cubby to hold loose items, like the cupcake liners I use for flower-making, a set of glass dishes for photos, and a ball of yarn. Yes, there’s already designated storage for yarn elsewhere. Yes, I unstored this ball of yarn because I thought the shelf needed more pink. Organization isn’t my strongest instinct.
That probably explains how that little white folded-up tiered stand made its way into the space between the bookcase and the wall. I probably organized it into that spot. Heaven help me if I ever need to remember where that is.
Finally, I set my knitting needles and crochet hooks on top of some books and filled the rest of the space with sentimental odds and ends. And part of a television. Which I painted blue. Again, I can’t always defend my instinctive choices.
But I’m happy with it. I think it looks pretty nice. Plus, anybody can do it. It only takes about a day, mostly waiting for paint to dry. And if you ask me, it’s miles better than boxes. Down with boxes!
