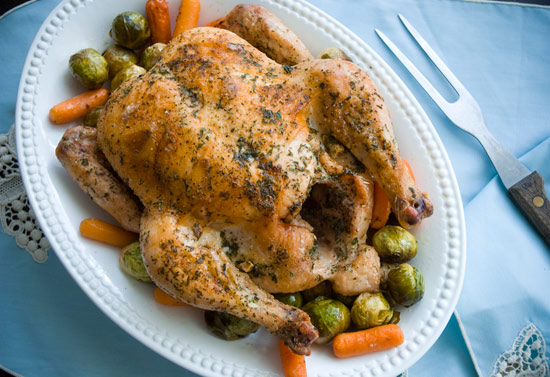
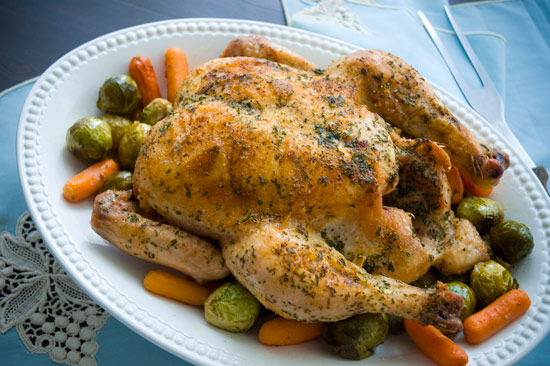
Roasting a chicken

I used to think that if you were “tightening your belt,” it meant you were making a decision to be more frugal from now on. I thought that somehow, the act of belt-tightening signified how strict you intended to be about sacrificing luxuries, the minute discomfort around your waist acting as a constant reminder of your thrifty new lifestyle. For instance, if you saw a pair of shoes you liked, the tightness of your belt would snap you back to an awareness of your no-unnecessary-purchases policy, and you’d put the shoes back with your head held high. “Thanks, belt,” your wallet would whisper. And your belt would be like, “No sweat, Mr. Folderson!”
I’ve recently had two disappointing revelations: wallets don’t talk, and “tightening your belt” clearly means that you’ve been forced to make sacrifices already—namely, you’ve sacrificed the expense of food because you couldn’t afford to eat properly, so now you’re too skinny and you have to tighten your belt to make your pants stay on. Because you’re also too poor for new pants. I find this profoundly depressing, as figures of speech go, and preferred the talking wallet.
For the last year or so, John and I have been doing what I might once have classified it as tightening our belts. We decided to do this because we don’t ever want to have to do the thing it actually means. (For what it’s worth, I will probably never use that expression again. I don’t like how casual it is. It’s like slapping Tiny Tim in the face.) We’ve just been trying to get smart and save a little cash. That’s all.
In the process, we’ve developed all kinds of praiseworthy domestic habits, like eating in, packing lunches, and stretching leftovers. As it happens, the cornerstone of all these positive advances has been one delicious weekly chicken. You’d be amazed at everything you can do with just one chicken a week.

In fact, not only would you be amazed, but you will be amazed, because I’m going to tell you all about the weekly chicken—which, by the way, you’ve probably already noticed is an excellent name for a poultry- or cowardice-related newsletter, and you might as well forget about it because I’m calling dibs. Just in case I launch a newsletter one day. For cowards. Or poultry farmers. Or cowardly poultry farmers, who either fear poultry or raise poultry that fears everything.
So. The weekly chicken. It’s a big chicken and I roast it on Monday. That’s the easiest meal of the week. Apart from unwrapping and washing the chicken (a task in exchange for which I’m convinced I should be exempt from literally all the other household chores, because washing a chicken is probably as gross as cleaning the toilets AND throwing out the oozy leftovers from the back of the fridge), the oven does most of the work.
I’ve had so much chicken-roasting practice, I could do it with my eyes closed. The only reason I don’t is because I am prone to kitchen accidents as it is and John has told me he prefers it when I don’t burn myself on the oven and scream about it.
Instead, I’m going to take all my chicken practice, and I’m going to run it all down for you. If you’re uncertain about chicken-roasting, you may find this educational. And if you’re perfectly certain about chicken-roasting, you can compare my method to yours! Then you can scoff at the parts that I do differently, and feel all kinds of superior! I mean, not that that’s the sort of thing I would do.
(I would. I do. I do that all the time.)
(But then I remember for later.)
(And I try the new way and if it’s better than my way I pretend that’s the way I’ve always done it. Zero conscience.)

So! Here’s how I roast a chicken, and always have since the dawn of time and I didn’t get any ideas from anybody*:
- Put the chicken in the sink. You’re going to want to contain this mess by any means necessary. I use a plastic grocery bag for chicken-tainted items, then tie it up tight and bury it in the garbage to help contain the inevitable stench.
- Unwrap the chicken and look in its butt. Has anyone crammed a sack of its own organs up there? Don’t worry, it wasn’t the chicken mafia. Butchers do this in case you want the organs for a recipe or ritual. They wrap this stuff separately to protect the rest of us from being reminded of how much chicken organs look like itty bitty people organs (I presume). Just yank that sucker out. You can save it for stock, if you like, or you can throw it away and forget it ever happened.
- Rinse the chicken, inside and out, under cold running water. (Take it easy with the water pressure, unless you want chicken-water to ricochet onto everything in a five-foot radius.) Hold the chicken up by its little wings and make it do a dance; this may help distract you from how much it sucks to rinse a chicken.
- Pat the chicken dry with a paper towel (or a kitchen towel you never want to see again) and place it—the chicken, silly—in a roasting pan.
- OPTIONAL: If you’re starting ahead of time, consider dry-brining. Chickens are notoriously lazy, especially when dead. They’ll sit around all day if you let them. Put yours to work! Rub about a tablespoon of kosher salt all over both sides of your rinsed-and-dried chicken so the salt can work its moisture-magic while the chicken sits covered in the refrigerator. Overnight is ideal, but even an hour or two is better than nothing.
- OPTIONAL: Sneak something delicious under the skin. Just before your chicken goes into the oven, slice up some garlic, butter, peppers, or anything else that might taste delicious. Slip it under the skin of the breast and anyplace else you can see an opening. An opening in the skin, that is, not in the chicken itself. The skin protects your garlic/peppers/deliciousnesses from burning.
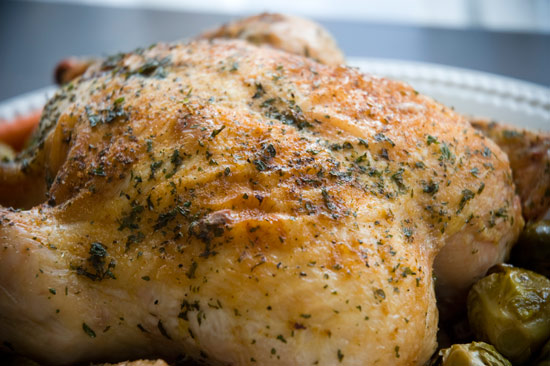
- Select your spices and mix them up in a little bowl with some olive oil. It’s easier than putting the seasoning directly on the chicken, and if you’re using aromatics, it gives you the opportunity to let those flavors infuse the oil itself. There’s a spot near the back of my stove that gets warm when the oven is preheating, so I like to rest my seasoning bowl there for a little infusing action. Note: Don’t add salt to your seasoning mix if you’ve already dry-brined the chicken!Here are a few seasoning suggestions:
- Basic Awesome Chicken: Garlic powder; dried parsley; black pepper. If you’re in a rush or like to keep it simple, this is plenty.
- Spicy: Add fresh sliced jalapeno, crushed dried chilies, and/or ground cayenne pepper to the Basic Awesome Chicken seasoning combination.
- Southwest: Cumin; cilantro; garlic (minced and/or powder); paprika; lime juice.
- Thai: Curry powder; garlic (minced and/or powder); black pepper; hot pepper; a pinch of ginger. For an extra boost of delicious, add some lemongrass and shallots to your seasoning and pulverize it in a food processor, then cut additional lemongrass stalks down to the length of the chicken and stuff them inside.
- Jerk: Cumin; cilantro; oregano; cinnamon; allspice; minced garlic; black pepper; cayenne pepper; a punch in the nose. HA! Jerk joke!
- Spread the seasoning all over the outside of the chicken, on both sides. Use your hands. You will hate this.
- OPTIONAL: If you like, you can wedge something into the chicken’s cavity, where its organ-sack used to be. I sometimes put a whole onion or a few cut stalks of lemongrass in there to flavor the meat from the inside. Don’t worry if doing this makes you feel obscene. That’s normal.
- OPTIONAL: You can also add vegetables or grains to the pan. They’ll soak up the juices that run out of the chicken, and the chicken will in turn get some flavor from certain vegetables. See the table at the bottom of this post for ideas and tips on keeping your chicken company.
- Cook the chicken breast-down first, then flip it halfway through cooking, so that it’ll roast evenly and the delicate skin on the breast won’t stick to the pan at the end. But here’s a secret: Sometimes, I don’t flip my chicken at all. Sometimes I put it in breast-side-up and I leave it breast-side-up the whole time and you know what? It cooks fine, the white meat and the dark meat are both delicious, and nobody seems to notice a difference. I’m just saying. But you, you should flip your chicken. For the sake of your dignity.
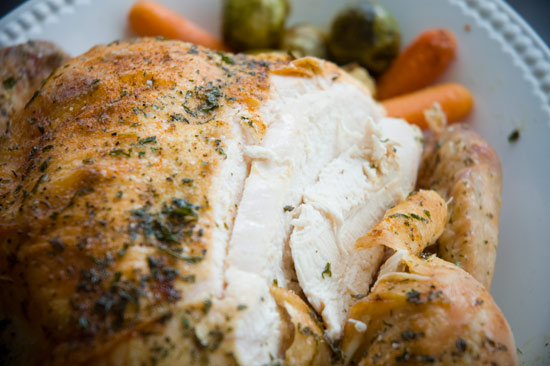
- I like to roast my chickens at 425F and set the timer for about 15 minutes per pound. The higher temperature results in a crispyr skin. But if you’re roasting vegetables as well, you’ll probably need to set the oven to 350F and increase the time to about 20 minutes per pound. Once the timer goes off, take the chicken’s temperature; you’ll probably end up putting it back in the oven for 15 more minutes or so, but it’s good to check anyway, to ensure that you won’t dry the meat out. (The idea is for the internal temperature of the chicken to reach 165–170F.) If you’ve stuffed anything inside the chicken, expect it to take another 15–20 minutes total.
- Pull it out of the oven, drape a piece of foil over the top (don’t seal it, just sort of lay it there) and leave it to rest for 10–15 minutes before carving. That’s just enough time to set the table, which you could’ve done while the chicken was roasting, but let’s face it, you started checking Reddit and forgot you were even cooking. Roasting chickens is just too easy.
I don’t know if you noticed, but a lot of those steps were optional. There are plenty of Mondays when all I do is rinse and dry the chicken, season it, and drop it in the oven. DONE. But I like having an arsenal of little tricks to make it different from week to week.

So that’s how I make dinner, every week, mostly from the couch. After dinner, John strips the remaining meat from the bones and seals it in a plastic container. He makes sandwiches for the entire rest of the week, and I make stock with the bones and vegetable scraps. The stock only needs some extra veggies and rice to become soup for another weeknight, because chickens are goddamn magic.
Mmm, soup. Now I want to tell you about stock (edit: shortly after this post was published, I did). But I think that’s enough chicken discussion for one day. You go roast something and I’ll talk to you later.
Keeping Your Chicken Company:Other Things to Roast |
|
| Onions | Cut onions into thick wedges, without fully removing the end, so that the layers don’t separate. Place these wedges so close to the chicken that they look like they’re trying to squeeze underneath. This will allow the onions to caramelize as the chicken roasts. If you place them away from the chicken instead, they’re likely to burn. |
| Potatoes, Brussels sprouts, and root vegetables | If they’re going to cook for the entire duration of the chicken’s roasting time, oil the pan a little first; otherwise, by the time you add them, juices from the chicken will probably already have greased the pan for you.In either case, you want only a single layer of vegetables scattered around your chicken. There’s a reason you’ve never had a recipe tell you to “crowd stew meat into Dutch oven” or “crowd cookies onto baking sheet.” Crowding causes problems. If you want to cook more vegetables than you can fit in one layer, cook the rest in a separate pan. Later, you can use a turkey baster to transfer some liquid from the main pan.Plan on turning them over once during their cooking time. |
| Other veggies | You can roast anything! Experiment, but keep an eye on things. If you’re trying a veggie you haven’t roasted before, be prepared for the possibility that you’ll need to take them out earlier than the chicken and keep them warm. Next time, you’ll know to put them in the oven later, after the chicken has had more time to cook. |
| Rice, barley and other grains | Note the cooking time on the package, but plan to increase it. Grains usually take longer to cook in the oven than on the stovetop, because they’re not being dropped immediately into boiling water. They also usually want to be covered, and most chickens prefer not to be covered, so you have a choice to make. Would you prefer some of your grains to maybe turn out a little dried out, or your chicken to have a not-particularly-crisp skin?Of course, there’s always a compromise. Place the chicken, the liquid, and the grain into the pan, cover, and cook at 350F until the grain is tender. Then scoop your grain out of the pan and into a serving dish and keep it warm. Crank the oven up to 425F and put the chicken back in, uncovered, to brown as it finishes cooking. |
*A lie. Obviously. I get lots of ideas from everywhere, all the time, including friends and relatives and passing comments from strangers. For instance, if you’re the person who uttered the phrase “dry brine” at that bar that time, or something completely different that I could’ve sworn sounded like “dry brine,” thank you! It was you who prompted me to read every article I could find on the subject of brining and dry brining—which isn’t technically brining—and then encourage the Internet, including you again, to try it. Unfortunately, that encouragement is also your reward. There will be no royalties. Um, thanks again.
