Coffee Trees
I feel like I should preface this by saying that I love the smell of coffee. Because if I don’t say that, the first thing you think might be, “Whoa, this must really smell like coffee,” thinking it’s an oversight on my part, and I don’t want you to get hung up on that thought. No. The coffee smell isn’t a byproduct. It’s a regular product. I have produced that coffee smell.
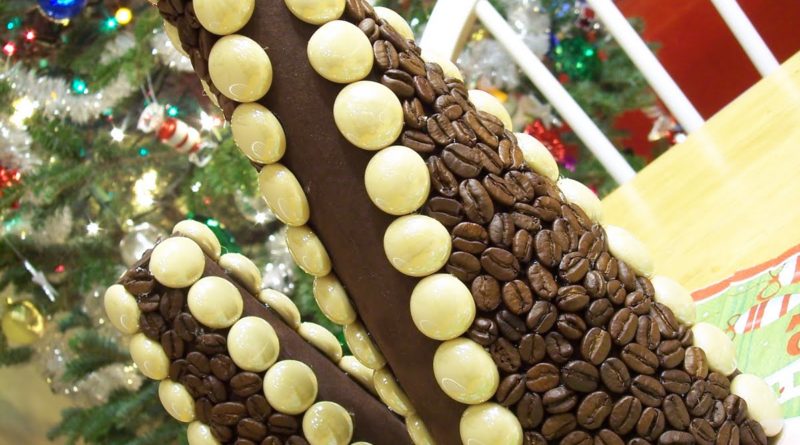
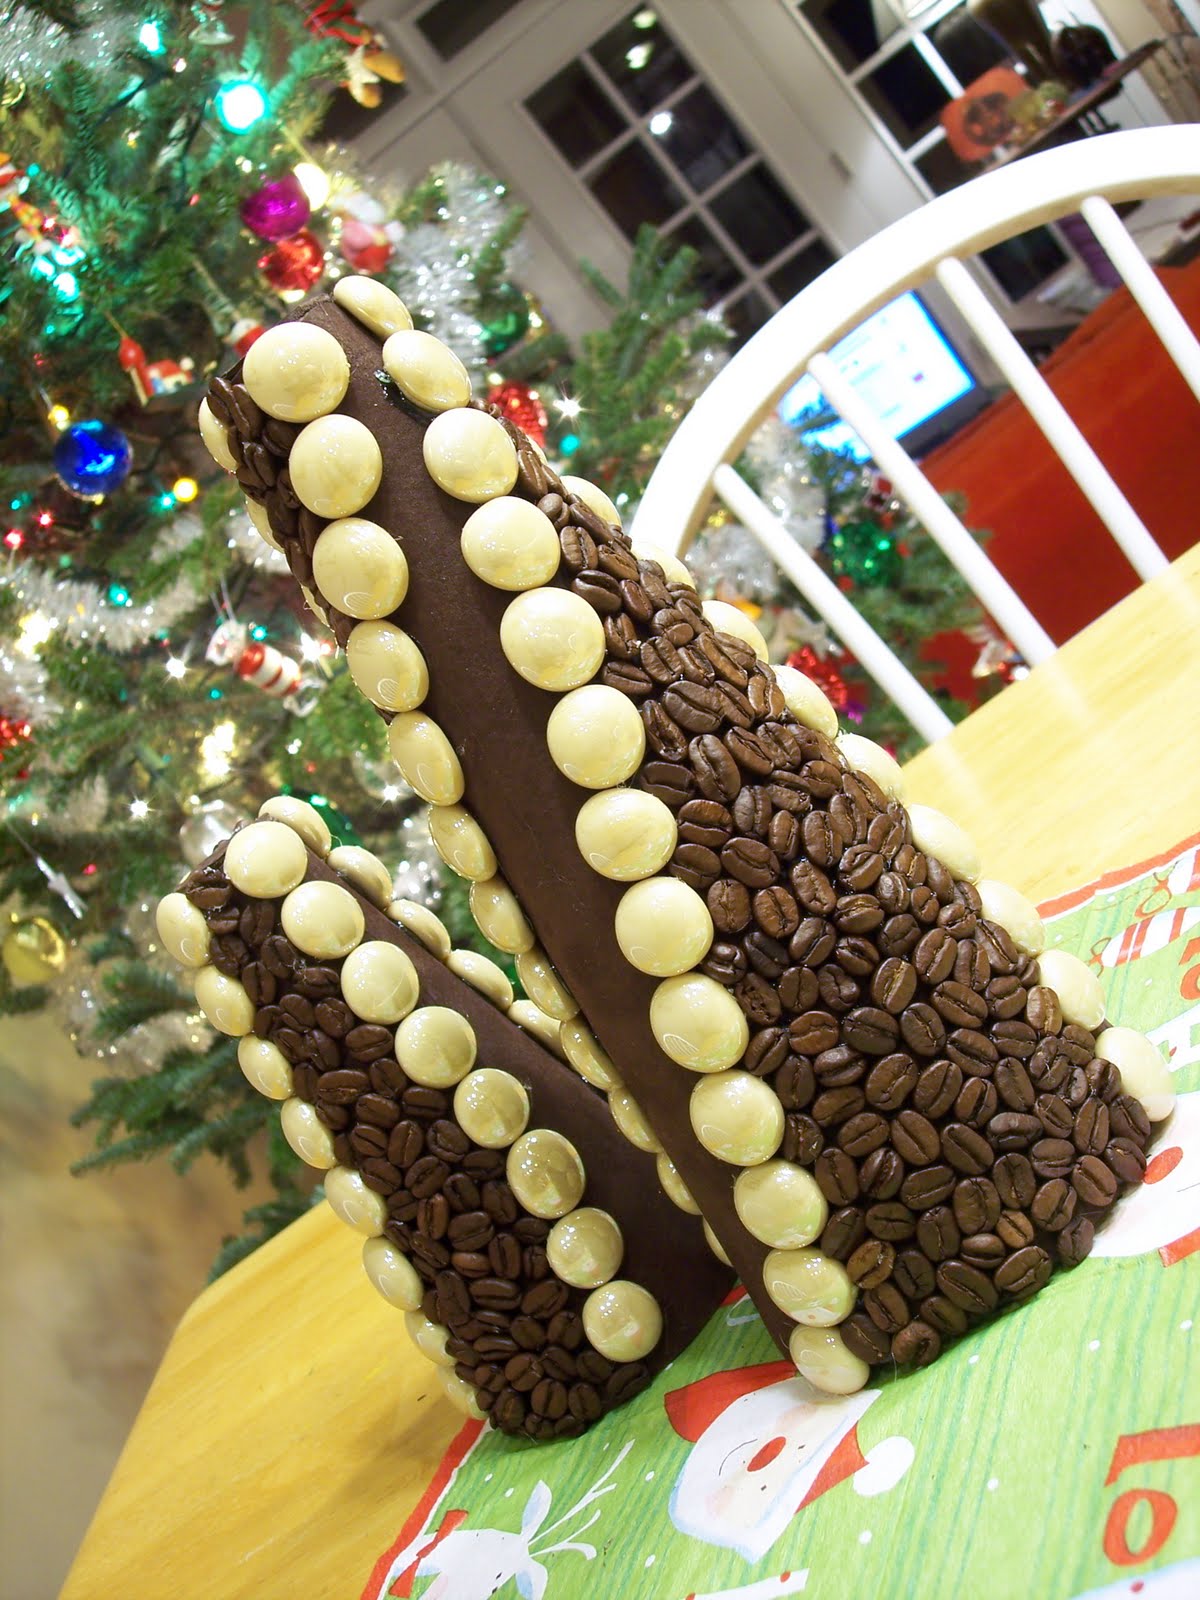
There’s nothing super innovative or crazy about this. It’s a simple project. I wanted a holiday centerpiece made out of coffee, and I found these flat, milky glass beads in the craft store that looked just the color of cafe au lait, and I happen to know that simple, repetitive actions can be therapeutic, up to a point, even an action as foolish as hot-gluing whole-bean coffee, bean by bean, to a styrofoam cone.
So here’s what we’re looking at here.
Ingredients:
- 1 styrofoam cone
- 1 piece of brown leather (I happen to have some discarded swatches left over from my furniture store days, but I think you can get something like this at the craft store, or use some kind of pleather, fabric, or pretty ribbon)
- 1 bag flat floral marbles
- 1 pound whole-bean coffee in a flavor that smells nice, like hazelnut (truth be told, you’re unlikely to use even half the bag, and that’s if you’re really picky about which beans are pretty enough to make the cut)
- Straight pins
- Hot glue ‘n scissors
- Lay the cone down on the leather, wrap it, and trim it to fit. It works best if it covers the whole thing without overlapping, if you’re using leather, because it’s thick. If you’re using ribbon, though, pin or glue it at the top and wind it all the way down to the bottom, so it covers all the styrofoam. Some overlap is probably fine in this case unless you’re using a fancy-edge ribbon. Regardless of the material, secure it near the seam(s) with straight pins or hot glue. (I’m telling you, though, straight pins are definitely easier.)
- Draw a nice swirly line down one side of the cone. (Pencil or ballpoint ink should work for this, but be as neat as you can so you won’t see it later.) If your seam falls in a pretty swoop, you can use that! Then, looking from the top down, mark a spot opposite the top of your swirly line, and the two spots exactly on the sides, so you have four spots marked at the top. Do the same thing at the bottom. Your four spots on the bottom probably won’t line up with your four spots at the top, because the line, remember, is swirly.
- Using the top mark and the bottom mark as a guide for your starting and ending point, make your other four swirls as similar as possible to your first one.
- Glue a row of marbles along each of your four lines.
- In the space between two marble-lines, carefully glue your prettiest coffee beans, one by one, so they completely cover the leather and fit together as well as possible. Turn them at different angles so they look random, and to help them fit into all the crevices.
- Do the same thing for the space on the opposite side, leaving every other quadrant beanless* so the leather shows. (If you didn’t put marbles down your seam, then make sure you glue coffee beans in that space so the seam won’t show!) Leaving half the spaces uncovered shows off your pretty underneath material, and it also adds a variation in texture that makes the whole thing even more interesting to look at.
*While I was writing this, I took a quick Google break to see if quadrant beanless was a googlewhack. I know you’ll be as shocked as I was to learn that Google doesn’t even consider “quadrant” to be a valid English word! And doubly shocked to know that word combination (or non-word combination, thanks, Google) already appears on over 350 other Web pages, whose ranks this one now joins.