I love southwest egg rolls so much. I always order them if I see them on the menu. I like regular egg rolls, too, the Chinese kind, with all the crunchiness and shrimp and stuff. In fact, you could say that I’ve long been a fan of the egg roll, but never a student. No way. Too complicated.
What I didn’t know was that egg rolls actually don’t involve any kind of mystical tradition handed down between generations in the mysterious Far East. Or maybe they do, but you don’t need to be privy to it in order to make some.
You just go look by the tofu and buy a pack of egg roll wrappers. Then you can pretty much make any kind of crazy egg rolls you want.
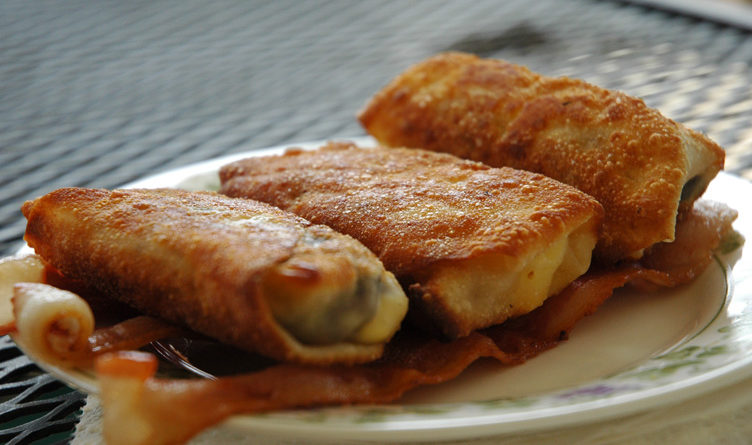
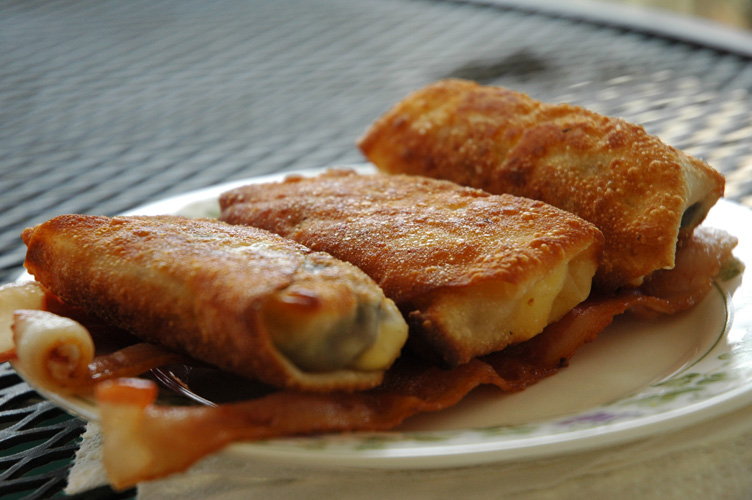
I started with southwest egg rolls. And they. Were amazing.
I made up the filling (seemed simple enough), and then skipped the deep frying. That’s right, they’re not deep fried! I mean, they are definitely fried in oil, so I don’t expect anyone to stand up and deliver a toast to my stunning ability to cut back fat from traditional dishes, but they’re not deep fried and there’s got to be at least a medal or a plaque or something coming to me for that.
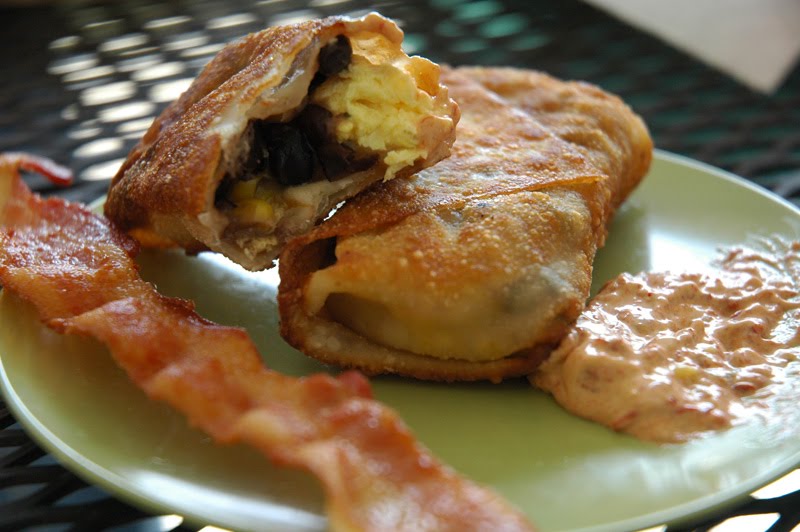
For dinner, I served these egg rolls with bacon-fried yellow rice and maduros, along with a chipotle sour cream and a lime sour cream for dipping. And beer. It was awesome. For breakfast? Same recipe, but I added scrambled eggs to the filling, and served them with bacon. Okay, and yeah, I still included that chipotle sour cream. But no beer. Don’t be gross.

Southwest egg rolls
- 2 boneless, skinless chicken breasts
- 1 medium onion, diced
- 1 small jalapeno pepper, diced
- 2 cloves garlic, minced
- 6 oz. canned yellow corn, drained
- 1 8 oz. can black beans, drained
- Shredded cheese (I like the Mexican Four-Cheese Blend)
- Egg roll skins/wrappers
- Olive oil
- Canola/vegetable oil
- Spices (Cumin, cilantro, oregano, saffron recommended)
- 3 scrambled eggs (if you’re making breakfast; otherwise, omit!)
- Cook the chicken. Tip: It’s a good idea to marinate it ahead of time, up to about a day, in the fridge. (I used olive oil, white wine vinegar, minced garlic, black pepper, and cilantro.) After that, you can cook your chicken however you like. I sauteed mine on the stove, but had I the option, I’d definitely have grilled it. Up to you. Just cook your chicken and set it aside to cool.
- Heat about a tablespoon of olive oil in a big pan over medium-high heat. Put the onion and pepper in and saute them, stirring frequently, until the onion begins to turn translucent. Add the garlic and saute for another 30–60 seconds, making certain not to brown it.
- Add the beans to the pan and heat through. Mash about 1/4 of the beans up a bit with the back of your spoon.
- Add the corn to the pan as well. Cook, tossing often, for about 5 minutes. Remove from the pan into a bowl and allow to cool slightly. Wipe the pan out a bit if there are bits still in it; you’ll want this pan to fry the egg rolls.
- When your chicken is cool enough to handle, tear it up and mix it in the bowl with the hot beans and corn.
- While your filling cools, study the illustrations on the back of your egg roll package if you haven’t rolled them before. They are very helpful.
- Roll ’em up. Lay a wrapper out (while you’re working with one, you should keep the rest either sealed up in a zip-loc or hidden under a damp towel, to keep them from drying out). Place a couple of spoonfuls of filling (including egg if you’re using it) in the middle of the diamond, sprinkle some cheese on, roll it up, wet the flap, seal it, and place it flap-side-down on a tray or cutting board.
- When all your egg rolls are rolled up, heat about 1/2 inch of canola oil in your pan again over medium-high. (If you were deep frying, you’d want it at 350, which sounds pretty hot.) Prepare a place for the finished egg rolls to go, like a big plate with some paper towels on it, to drain the oil.
- When the oil is hot enough, use tongs to carefully place as many egg rolls as will comfortably fit (no touching!) flap-side-down. By the time you get them all in, it may be time to turn the first one over, so be vigilant! As they begin to brown, flip them over. Once the reverse browns, you should be able to stand them on their sides so they brown all the way around. The ends won’t get fried, but you won’t notice. Once they’re nice and brown and crispy all the way around, gently remove them from the pan and place them in the paper towel nest that you made for them. Let them sit for five minutes so nobody will get burned.
- Serve!