Njicki’s Braided Scarf

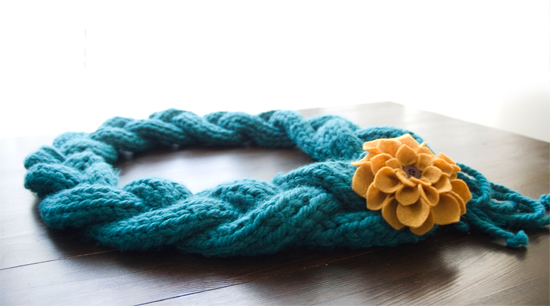
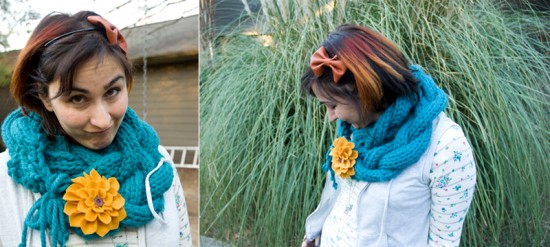
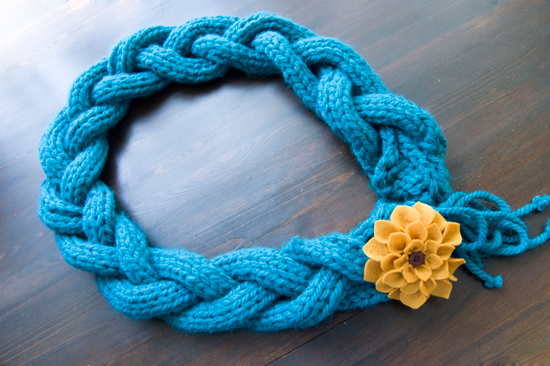
This past Christmas, I opted for an exaggerated spirit of cheerful thriftiness and handmade a bunch of presents for family and friends. I knew I could make nicer gifts than I could afford to buy, like this chunky improvised scarf, which now lives in Ohio with my dear friend Njicki. (I embellished it with a yellow flower pin, from a tutorial I spotted on Pinterest). It—the scarf, not the flower—is very warm. The flower is exactly as warm as it looks.

Although I didn’t use a pattern for the scarf, indicating that one doesn’t need a pattern for such a scarf, I would like to make another scarf like it someday and if I don’t write it down, no matter how simple it is, I’ll never be certain whether I’m doing it the same way, or what the hell I did in the first place. Often, throughout the day, I find myself thinking, “I’ll have to remember this for later,” and even as I’m thinking it, my brain responds by becoming actively aware that no remembering will be done. It doesn’t even pretend that it means to remember. It’s like it’s shouting, “NOPE!” and laughing in my face. Of course, I have to tip my hat, because laughing in my face is, owing to the position of the brain within the skull, something very few things other than my brain can actually do.
So. Since I have no choice but to write the pattern down anyway, I may as well share it with you. If your brain is anything like mine, you’ll finish reading this, scan the pattern for difficulty, think, “Yes, I’d like to make this someday,” and then promptly forget what it was called, where you saw it, or what in fact it was. Months from now, out of nowhere, you’ll get a shadow of a vague idea that you’ve once seen something—”I think it was some kind of…knitted…headband?” you might say—and you’ll suddenly feel very strongly that you would like to find this thing and make one of whatever it is. You’ll grapple around your brain and your browser history, unsure what you’re looking for except that it’s exactly what you want, and it’ll be right there, a blurry teal silhouette (“…or was it yellow?”) at the edge of your memory. And there it will stay until it teeters off into the deep pit of things you forgot you ever meant to remember, like the phone call you answered last week with “Let me call you right back,” and how to use the Periodic Table.

(By the way, you can see in this photo that somehow, I connected one strand of my scarf backwards. It, uh, adds an element of handmade charm. Whatever I did wrong, I corrected it in the pattern. Normally I wouldn’t post about it until I’ve had a chance to snap a new photo, but I like this scarf as it is in spite of that little error, so please use your imagination.)
Njicki’s Braided Scarf
(On Ravelry)
Materials: 2 skeins Sensations Sumptuous yarn (you should have less than half a skein left over), which is available exclusively from Joann’s, or yarn of a comparable thickness.
Tools: Size 17 knitting needles [link], stitch holder.
Notes: Each of the braided strands of this scarf is formed by a long stockinette rectangle just five stitches wide, which then curls into a tidy cylinder for convenient braiding. The look, as shown, requires a super chunky yarn such as the one recommended, which is sold at Joann’s. The gauge is less than 2 stitches per inch.
Cast on 5 stitches, leaving behind a 14″ tail. Tie this tail securely and do not work it in to the knitting.
Row 1 (RS): K1, (M1, K2) twice. [7]
R2: P. [7]
R3: K1, (M1, K1, M1, K2) twice. [11]
R4: P. [11]
R5: K2, (M1, K2) 4 times, K1. [15]
R6: P. [15]
The scarf is now worked as three separate strands, which will later be braided. Only five stitches will be worked at a time. Keep the remaining stitches on your needles while you work each strand. This will become bulky to turn, so take care that your working yarn isn’t getting wound around your strands.
Row 7: K5 and turn.
R8–129: Continue in stockinette stitch, ending with a K row.
You should now have one needle with 5 stitches on it in your right hand, and another needle with 10 stitches on it in your left hand, connected by the long strand you’ve just knitted. Trim and tie off the working yarn (with about 10″ tail), and leave the 5 stitches of the finished strand on your right hand needle for safekeeping as you work on the others. K into the next 5 stitches on your left hand needle, and repeat rows 8–129 to create this second strand, again ending with a K row, and again cutting the yarn. Carry both disconnected five-stitch-wide completed strands on your right hand needle as you repeat this strand-making process with the final five stitches.
You should once again have all 15 stitches on one needle, with the yarn cut between every 5 stitches. Move the first five stitches over to the second needle, and the center five stitches onto a stitch holder, so that you can now move each of the three strands separately. Carefully braid the three strands together, then place all 15 stitches back onto the same needle, facing the same direction, with the working yarn (still attached to the skein) toward the tip.
Work Row 130 across all 15 stitches.
Row 130: P. [15]
R131: K2, (SKP, K1) twice, (K2tog, K1) twice, K1. [11]
R132: P. [11]
R133: K1, SKP twice, K1, K2tog twice, K1. [7]
R134: P. [7]
R135: K1, SKP, K1, K2tog, K1. [5]
R136: P. [5]
Bind off knitwise, leaving a 14″ tail.
Your scarf should now have a 14″ tail dangling from one corner on each side. Tie a small knot at the end of each of these tails.
Cut four 29″ strands of yarn. Tie a small knot at each end of these as well, and attach one strand by its center to the middle of each end of the finished scarf, leaving both knotted ends of the strand dangling. Then attach a strand in the same manner to each corner of the scarf that doesn’t already have a tail. You should now have five strands of yarn dangling from each end of your scarf: one on the corner (your starting or ending tail), two in the middle, and two on the opposite corner.
Gather the strands from both ends and tie them in a bow so that the scarf is now a loop. Weave in any loose ends, making sure that they’re first tied so that they won’t end up working their way out.
