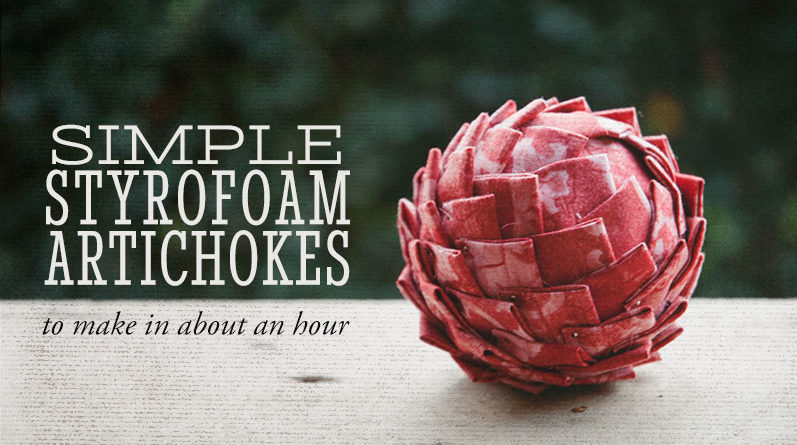
Instant Artichokes

Important Facts About Artichokes:
- They are a tasty snacktivity.
- They look cool.
- There’s some kind of positive historical symbolism associated with them, probably because they are tasty and they look cool.
- They are easy to make out of Styrofoam and fabric scraps.
I’m going to tell you all about this little artichoke craft in a minute, but first I need to squeeze in a quick word about the Gangbusters treasury contest and its winner. Is it you?!
YES! It is you!—rather, it is you if your name is Shannon Finck, a.k.a. lilyhad2queens, and you submitted this treasury of gifts for the baddest girl in your life: In the city, there’s a thousand things I want to say to you. Congratulations, Shannon! Please report in via the Contact page sometime in the next seven days so that I can send your $25 Etsy gift certificate!
May I also say that I loved each and every one of the treasuries you all created, and that this was a very tough decision, and I thank you very, very much for participating. I will try to post more little giveaways like this so that you can have more chances to win!
Hooray! Let’s artichokes!

I think these are so pretty, and they’re perfect for lazy crafternoons with friends. I love the way they look on our tables in the fall. Plus, when I put out the dark green ones I made with my mom, all the little artichokes get infected with holiday spirit and turn into Christmas decorations. I have the feeling that in a few months, I’ll be making some in pastels for spring. Oh, or green, like artichokes. That’s pretty appropriate.

These particular fabrics were selected using an extremely scientific mathematical process (empirically, they were the most discounted ones on the clearance table). Each artichoke uses a quarter to half a yard of fabric, so at about $2/yard, plus the rising cost of Styrofoam balls, each life-size artichoke costs between $1 and $1.50 to make depending on size and fabric choice.
It may take you up to an hour to make one, depending on whether you’ve done it before. That is, your first one might take the full hour. After that, your hands can make the artichokes while your brain naps in front of the TV or your face bores your friends with stories about work (is it just my face that does that?) and it still won’t take you the full hour.

This project was inspired by some balls I saw (haha!) on Pinterest, with a few minor adjustments. I can’t find the pin anymore, but they were definitely called balls, and they were definitely made from fabric squares. If anyone knows the source, please link it in the comments! [Update: Alert reader Jesse tracked down the original post from Knitty Gritty Knits. Thanks, Jesse!]
You’ll need these:
- A Styrofoam ball. A three-and-a-half-inch ball will give you a roughly life-sized artichoke, but you can make them any size you like.
- Fabric. Half a yard should be more than enough.
- Straight pins.
- A plastic bottle cap (optional).
You’ll do this:
- Cut your fabric into squares roughly the size of the diameter of your ball. For a 2″ ball, cut 2″x2″ squares. For a 3 1/2″ ball, 3″x3″ squares will do.
- Pin one square down against the ball using four pins, one at each corner. This is now the top of your artichoke.
- Jam your optional bottle cap gently into the opposite end of the ball so that most of it is still sticking out. Pin another square of fabric as close as you can around the place where the bottle cap meets the ball. This is now the stem of your artichoke.
- Fold a square into quarters, then pin it, folded-point-up, to the ball. (Refer to the photo above, showing two squares completed and a third in the process of being added.) Do this with each square, working in rounds from top to bottom, until the entire artichoke is covered. Try to cover up your straight pins with the next row of squares, but all is not lost if some are showing. Don’t drive yourself crazy. Once you have a few rows done, you’ll begin to see it come together. And if you don’t like the way it’s turning out, it’s easy as pie to unpin and redo a row.
- I, too, expected there to be at least five steps, but there aren’t! It’s really as simple as that. Pin little folded squares all the way to the bottom and then you’re done and you have an artichoke. Ta-da!
My much craftier friend Jenny informed me that this is very similar to something called “ribbon pinecones.” I wasn’t sure what “ribbon pinecones” were, so I tried googling it, and I saw a lot of real pine cones dangling from people’s front doors on lengths of ribbon. My instinct told me this was not similar at all.
But with a little patience, I was able to find about one million tutorials similar to this one, except instead of fabric squares you fold lengths of ribbon, and instead of an artichoke you make a pine cone. From that, I inferred that making this artichoke out of a Styrofoam egg instead of a ball would result in a pine cone instead of an artichoke, so I tried it and eureka, yes it did, so there you have it! Also, if you want to use ribbon instead of fabric, that seems to be very much an option. I mean…that’s common sense, kind of. I feel like I could’ve told you that. And I guess I just did.